
How To Incubate Corn Snake Eggs
Deciding to raising your own babies
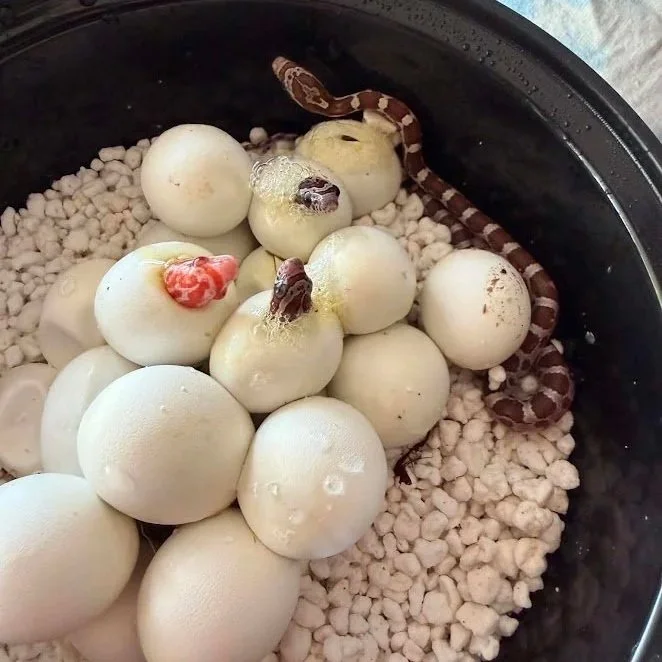
A clutch of baby corn snakes pipping.
Deciding to raise your own clutch of eggs can be an incredibly fulfilling and exciting adventure, however it should be done only by those who are willing to work with the positives as well as the negatives. Often people pair snakes, have lot of success and then are sat with many mouths to feed and no homes for them to go to. Before pairing the adults have a look at the market, talk with local shops and decide if there will be homes before pairing even begins. If you know they will have homes or you are willing to house all of the off-spring then this will be an exciting venture.
The other side to consider is, it is not always rainbows and peaches. Are you wiling to pay vet bills for the mother if there are complications, what if there are babies are not willing to eat, there are risks, babies are born with kinks or deformities. How do you feel about having to source methods of ethical euthanasia.
If none of this is daunting and you feel confident moving forward, welcome to the world of colubrid breeding and I hope this article is helpful to you.
Setting up the incubator
There are many incubators available to buy, if you are only looking to hatch one or two clutches they sell small desk top incubators that are only 25ltrs. The main thing to make sure is that it is a reptile incubator and not a bird incubator as reptile eggs do not survive being turned over. I have used them in the past, but currently I am using a converted fridge.
I bought the one pictured below second hand and it had already had the gas cannister removed and converted. It has heat mats at the back which are being controlled by a thermostat and a desk fan to create air flow. Heat rises so this help stop the bottom of the incubator being significantly cooler than then top shelf. The bottles of water are to help keep the air stable in the case of power cuts or rapid room fluctuations. The main thing is ensuring the temperatures are stable as rapid spikes or drops can cause harm to the babies development. I have a digital thermometer telling me the humidity and temperature which i try and look at every time I walk past. The more you check the quicker you spot issues.
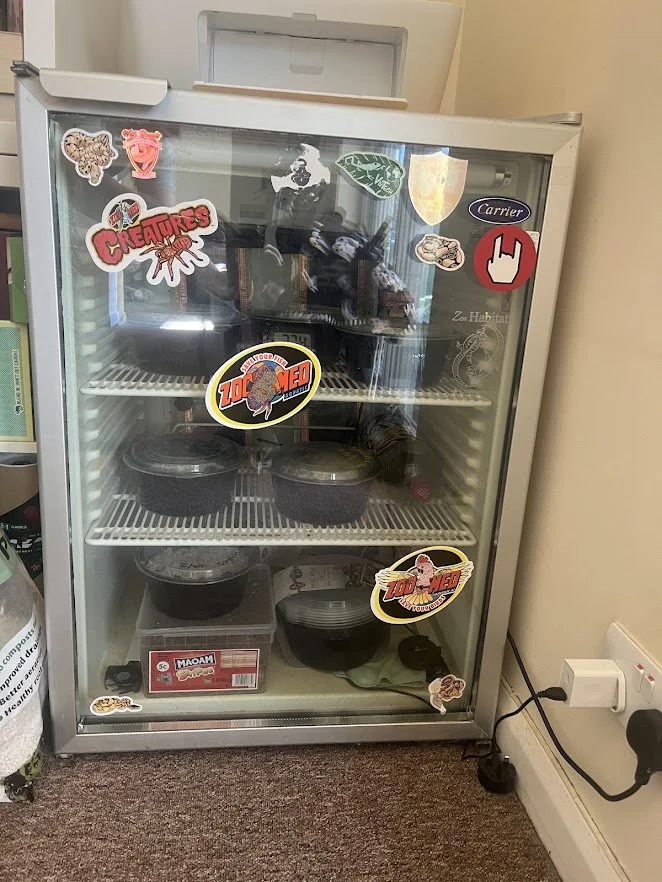
My DIY incubator.
Setting up the eggs in the incubator tub
Over the years I have used many different styles of tubs that have had varying success. The one that I have settled on are microwaveable food prep tubs. They have a single hole for ventilation which is small enough to not allow even a tiny baby to escape , but prevents the humidity from escaping.
I have trialled a variety of incubation mediums and have settled on perlite. Its bright and clean looking, holds moisture well and does not stick to the babies, get in their mouths, or stick to their umbilical cord. After discussing how our friend who incubates successful every year we could the perfect ratio of water to perlite for our tubs and incubator. He suggested 70g of water to 70g of perlite, we reduced this to 50g of perlite to make more space for eggs and then we simply put the eggs on top if the medium and leave them till they all pip. Of course this might not work for everyone and there are a few problems that can occur and you need to look out for.
Another less exact method that can be altered to any tub size is the sand castle method. The sand castle method is add small amounts of water to the perlite and hand mix. If you can squeeze a handful and no water dribbles out of your closed fist then you have a good ratio, this if often described as the perfect consistency to build sand castles just like when you were a kid. Note that this method is far more intuitive and its a good idea to make multiple small air holes at opposite sides of a tub to create a small amount of cross ventilation. You can always tape up holes or remove tape to adjust in real time. Just make sure you tape holes off from the inside so the sticky side of the tape is not able to be touched by baby snakes.
Eggs can go mouldy, this has happened to me in the past and is most likely due to the medium being too wet or bacteria in the incubation medium. You can either use athletes foot powder or Leucillian antiseptic spray to treat the mould and try to air out the incubation tub slightly to lower the humidity. Having cross ventilation holes can help with this. If the eggs are too dry you will get the opposite problem and they will begin to wrinkle and shrink. healthy eggs will steadily swell and grow as the babies grows and absorbs the water from the perlite. If you notice this add small amounts of water to the medium and check. They should begin to fill back out again, if humidity collects on the lid this is your sign to stop adding any more water and wait for them to absorb the moisture.
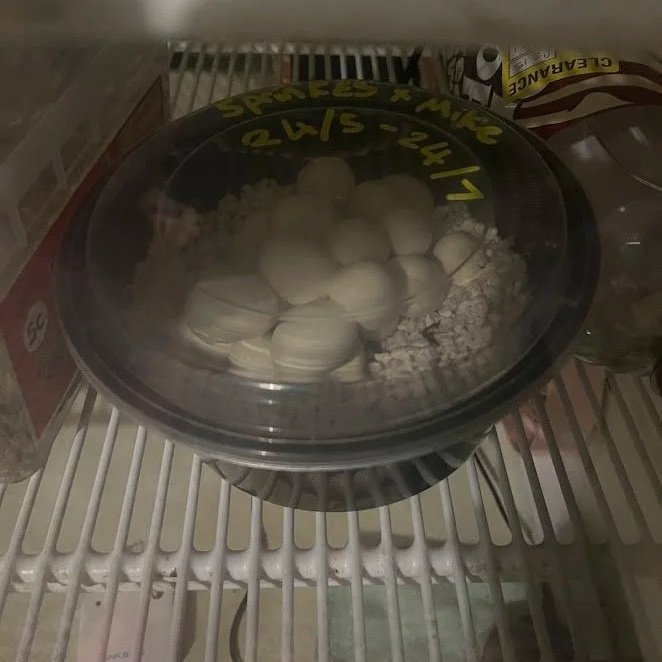
Eggs sat on perlite in their tubs within the incubator.
To split or not to split
There is a massive divide in breeders and hobbyists on whether when placing eggs in the tubs whether you should pull the eggs apart or not. Some breeders will meticulously pull the eggs apart one by one candle them (place them on a light to show where the air bubble is so they do not roll the egg and kill the baby inside, the air bubble needs to be at the top) and mark with a marker pen which way up they go and place them in rows.
Mother nature has already thought of a solution to prevent egg rolling, the eggs stick together and form a bundle that keeps them all in place, so I simply place this in the tub and I have never had any issues. If there is a loose egg or two I will candle and mark these and try to snuggle them next to the other eggs. There are studies to show they communicate with each other from within the eggs, so I don’t want any babies to be left out. There is less risks of rolling, less risk of ripping eggs and they seem to hatch just fine.
A clutch of corn snakes pipping still clumped together.
What is a slug and how to spot one
A slug is a term used within the hobby to describe and infertile egg. They can often be spotted because they are smaller, yellow and often misshapen. I always say, if in doubt incubate, the worst that happens is the slugs go bad. I have never seen bad eggs within a clutch effect the healthy eggs and they still hatch out healthy and happy. If they are loose just keep them to one side within the tub and if they go bad you can remove them.
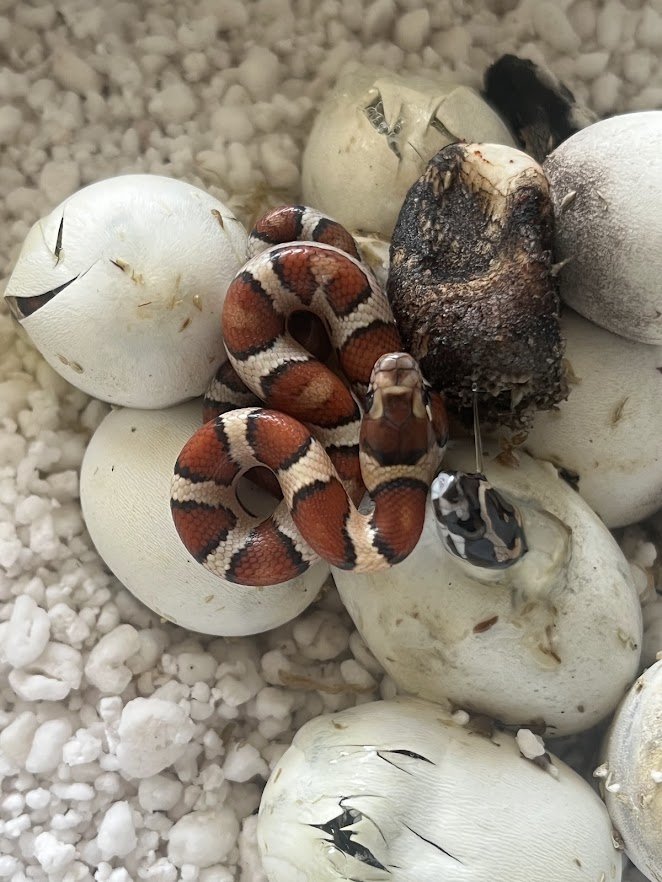
Corn snake hybrids hatching next to a slug egg that has gone bad with no issue.
What to do about pipping
After three months the eggs will start to dimple, this is the first sign you are about to have a corn snake population boom. Babies will start to use their egg tooth to one by one emerge from their eggs within a couple of days of the dimpling starting.
The best method is to simply let them hatch when they are ready. Leave them in the tub until each baby has hatched, usually within 3 days of the first baby cutting its egg. The babies crawling over each others eggs helps tell the other siblings its time to get out of bed so do not worry about getting them separated just yet.
Not every baby will hatch so after three days you can remove each baby to their own separate tub and you have a clutch of corn snakes to raise. I always air on the side of caution and leave unhatched eggs in the incubator until they go bad because I would hate to give up on a late bloomer.
Raising hatchling corn snakes
Now you have successfully managed to have a whole clutch of hatchling corn snakes on your hands, you will need to get them through their first shed, get them feeding and get them started for the rest of their lives. Stay tuned and look out for the next care sheet on raising hatchling corn snakes.
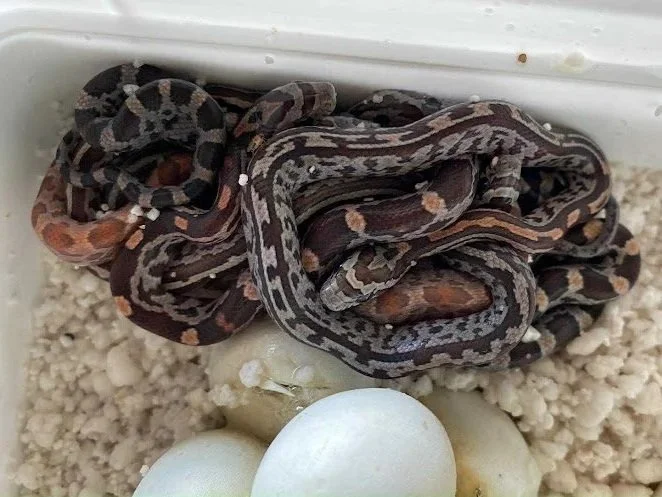
Baby corn snake clutch bundled together after hatching.
